LED strip lights are divided into numerous categories, such as Led Linear Light and Led Vapor Tight, and their installation procedures differ. Let’s look at installing waterproof 12V LED strip lights indoors using the Meishida-led.com LED 12V strip light. The installation technique is the same if you buy non-waterproof Led Channel strip lights.
Here is the complete guide to installing LED Strip Lights
Step 1. Clean your walls/object surfaces
Whether you choose to place the LED strip lights on your bathroom ceiling, the bottom of your bathtub, or behind your mirror, the first step is to make sure the surface is dry and clean. The 3M super glue on the LED strip light won’t be able to stick to the surface where you want it to be installed.
Step 2. Remove the super glue from the strip light and stick it on
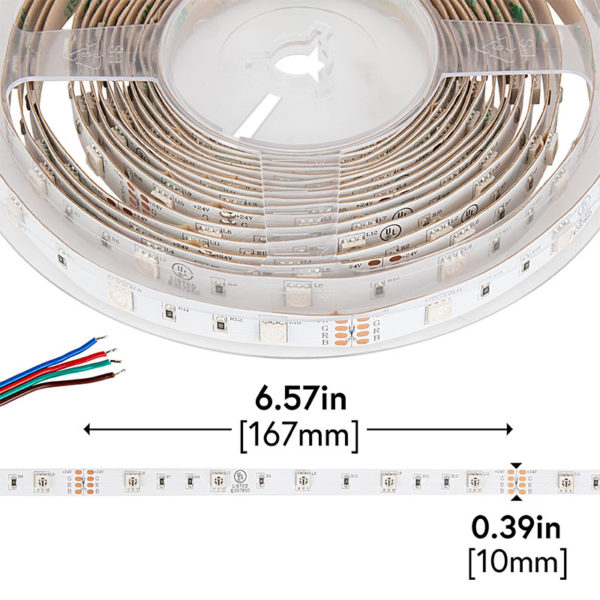
After cleaning up, remove the 3M super glue from the back of the LED strip light and stick it in the desired spot. If there is a surplus section after gluing it on, you can use scissors to cut the strip light where the cutting marks are. You can also collect measurements before applying it, then prepare a strip light of the appropriate length.
Step 3. Connect the controller to the strip light
If you bought a strip light set, the connector would contain images inside to help you connect your strip light and controller. The power is connected to the other end of the controller.
Step 4: Connect to power and turn on the strip light
After connecting the controller to the power source, you may use the remote control to turn on the strip light.
Following the above four steps, you can easily install LED lights in your room or other space.